Epoxy Explained
Learn what epoxy is, how it works, and when to use it for strong, long-lasting repairs. Discover the differences between Gorilla Epoxy Clear and Gorilla Epoxy Ultimate to quickly choose the right option for your project. Find step-by-step guidance and pro tips to help you get the strongest possible bond.
.webp)
Learn what epoxy is, how it works, and when to use it for strong, long-lasting repairs.
Find step-by-step guidance and pro tips to help you get the strongest possible bond.
Compare your options to find the perfect fit
Gorilla Epoxy Clear
For clean, quick, indoor fixes:
Go with Gorilla Clear Epoxy.
.avif)
Gorilla Epoxy Clear
For clean, quick, indoor fixes:
Go with Gorilla Clear Epoxy.
Gorilla Epoxy Clear
For clean, quick, indoor fixes:
Go with Gorilla Clear Epoxy.
Gorilla Epoxy ClearIncredibly strong formula, clear, spotless finish | -min.avif) Gorilla Epoxy UltimateOur strongest epoxy formula | |
|---|---|---|
Set Time | 5 minutes | 10 minutes |
Strength | Up to 3300 PSI | Up to 4250 PSI |
Curing Color | Clear | Black |
Water Protection | Water Resistant | Waterproof* |
Best For | Household repairs, glass, ceramics and surfaces where clear appearance matters | Heavy-duty repairs, outdoor projects, and surfaces exposed to moisture |
*Bonded wood materials should not be submerged or soaked in water
When the job demands strength and durability, try Gorilla Epoxy
From household fixes to heavy-duty repairs, Gorilla Epoxy Clear and Epoxy Ultimate deliver dependable results.
Designed to handle demanding repairs, Gorilla Epoxy offers incredible bonding strength.
.webp)
Fills voids and spaces for a tight, long-lasting hold—even on uneven surfaces.
.webp)
Bonds a wide range of materials, making it a go-to adhesive for nearly any project.
What Exactly Is Epoxy and
How Does it Work?
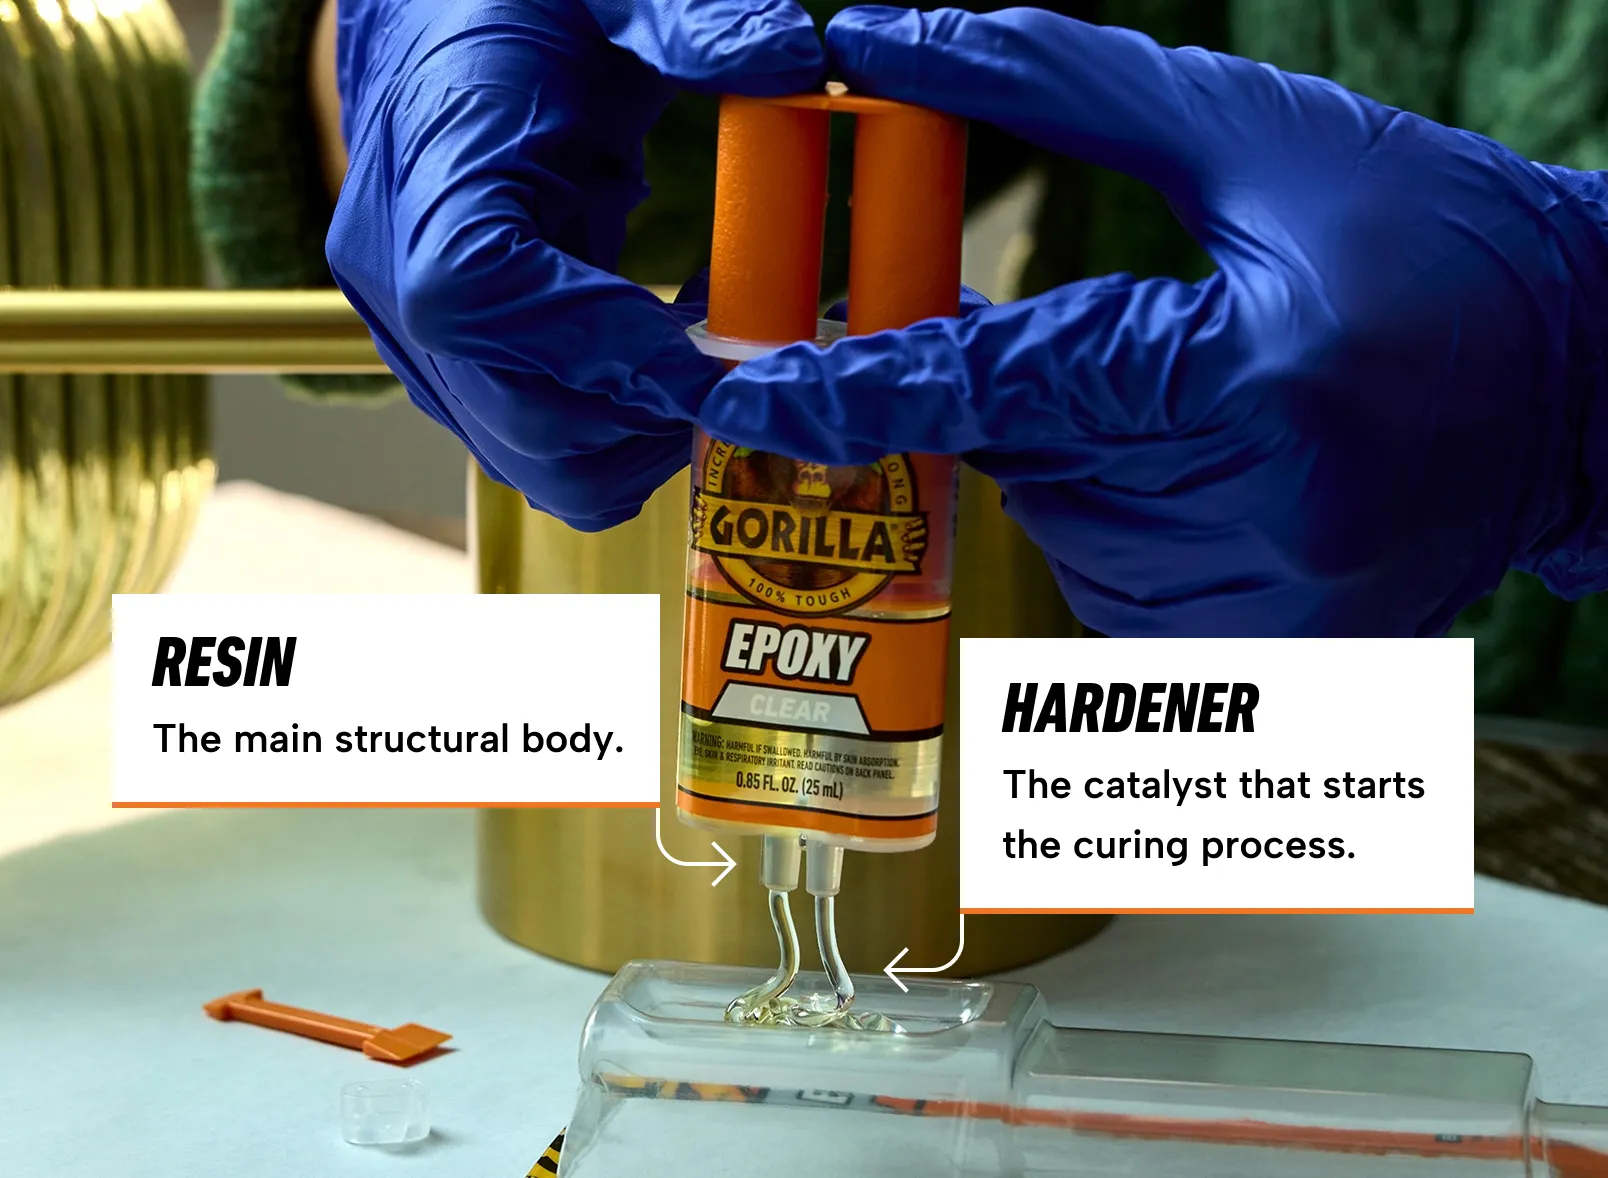
Epoxy is a strong, versatile, two-part adhesive made by mixing a resin and a hardener. Once combined, a chemical reaction occurs, creating a durable, water-resistant bond.
When the two ingredients are mixed together, the mixture begins to cure over several minutes, ultimately creating a durable, rock-solid bond during the curing process.
How do I use Gorilla Epoxy?
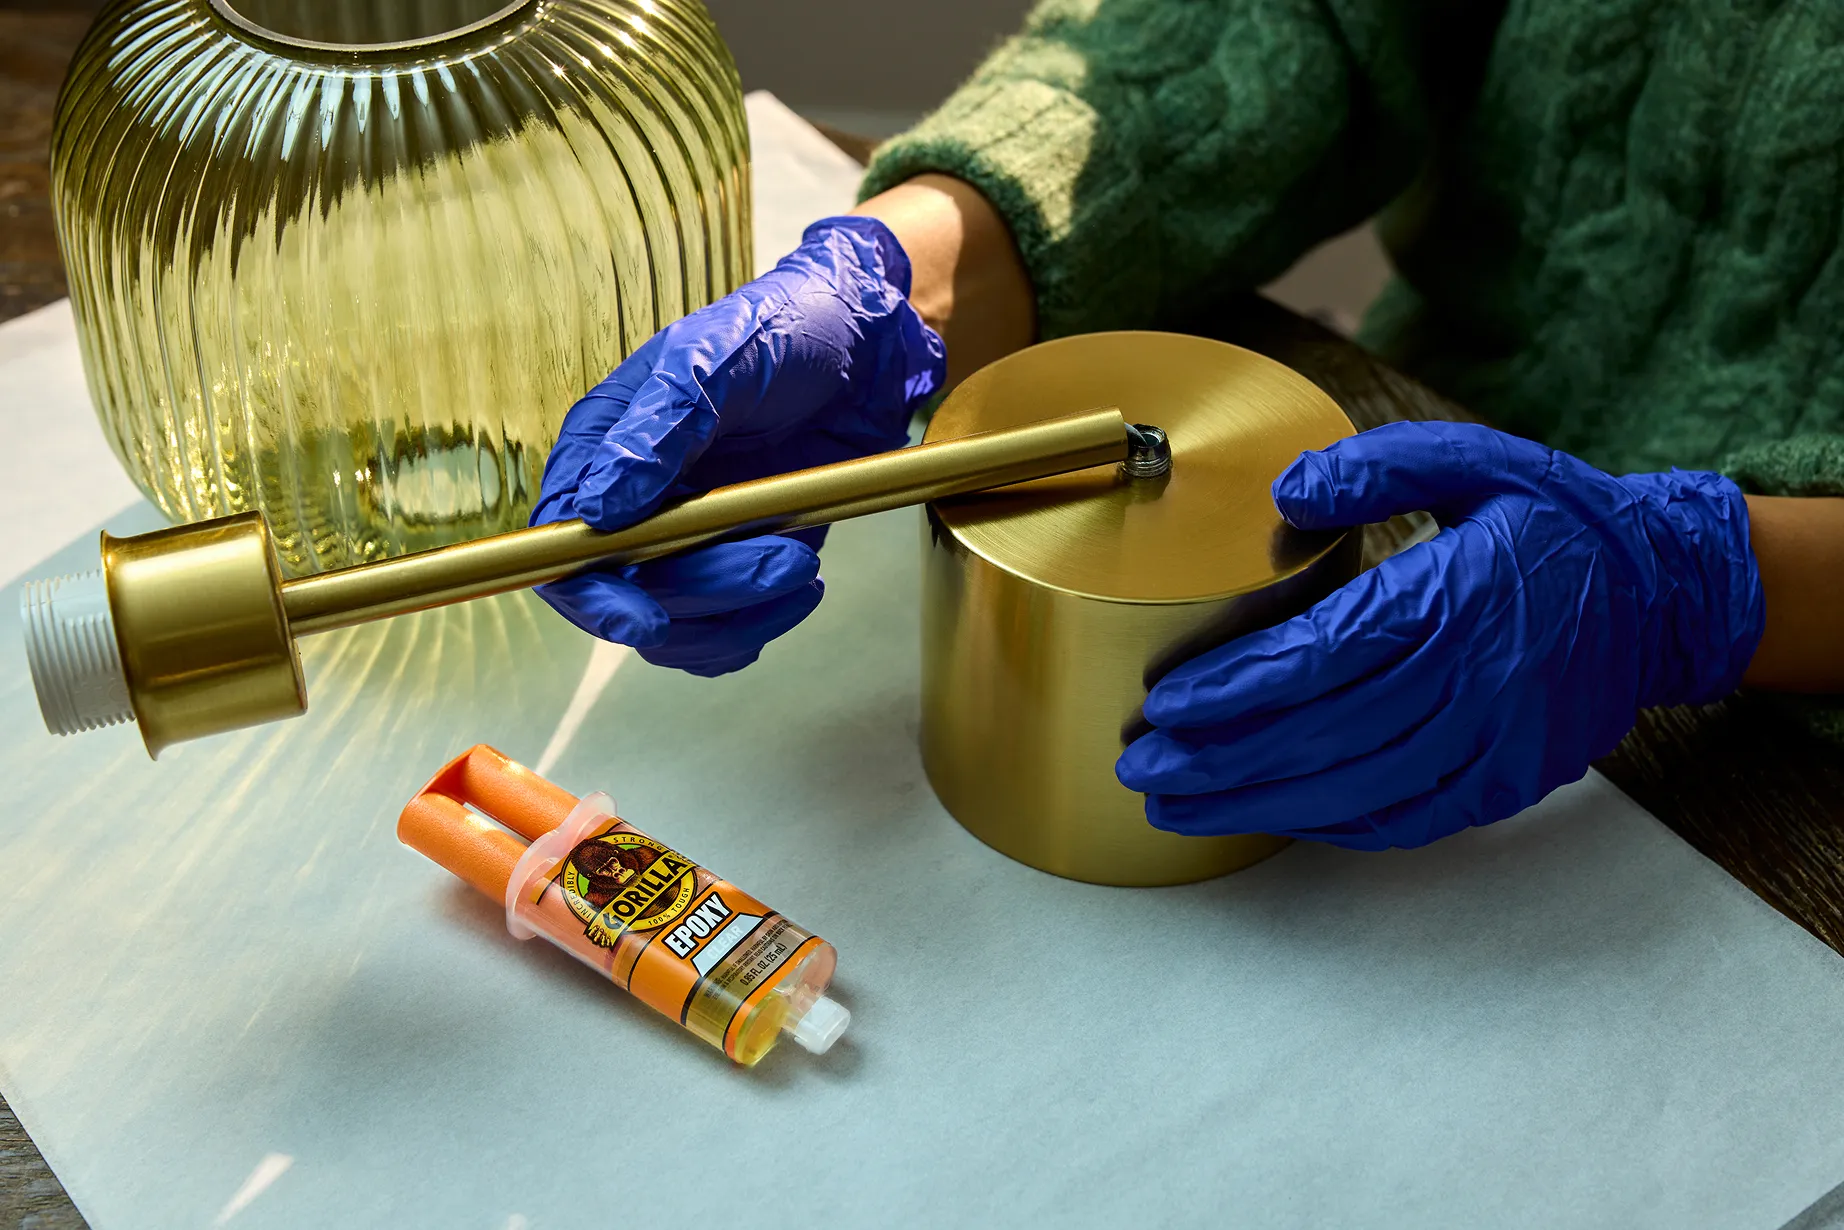
Work in a well-ventilated area and protect your surface from spills. Have your mixing tray and stir sticks ready before you begin.
For the best bond, lightly roughen smooth areas. Then clean and dry all surfaces to remove dust, grease, or debris.
- Remove stir stick from the middle of the plunger. Prior to opening, pull back slightly on the plunger to help minimize initial product flow.
- Remove the cap from both syringes.
- With the tip pointing upward, snap or cut off the end from the tip of the syringes.
- With the tip still pointing upward, slowly press the plunger until resin and hardener reach the tip. This removes air and ensures an even flow.
.webp)
- Push out equal parts of resin and hardener onto a clean, disposable surface. The package can be used as a mixing tray.
- Mix thoroughly for about 20 seconds until the mixture is uniform.
- As you mix, you will notice the epoxy warms up. This is a reaction that occurs as the resin and hardener combine.
.webp)
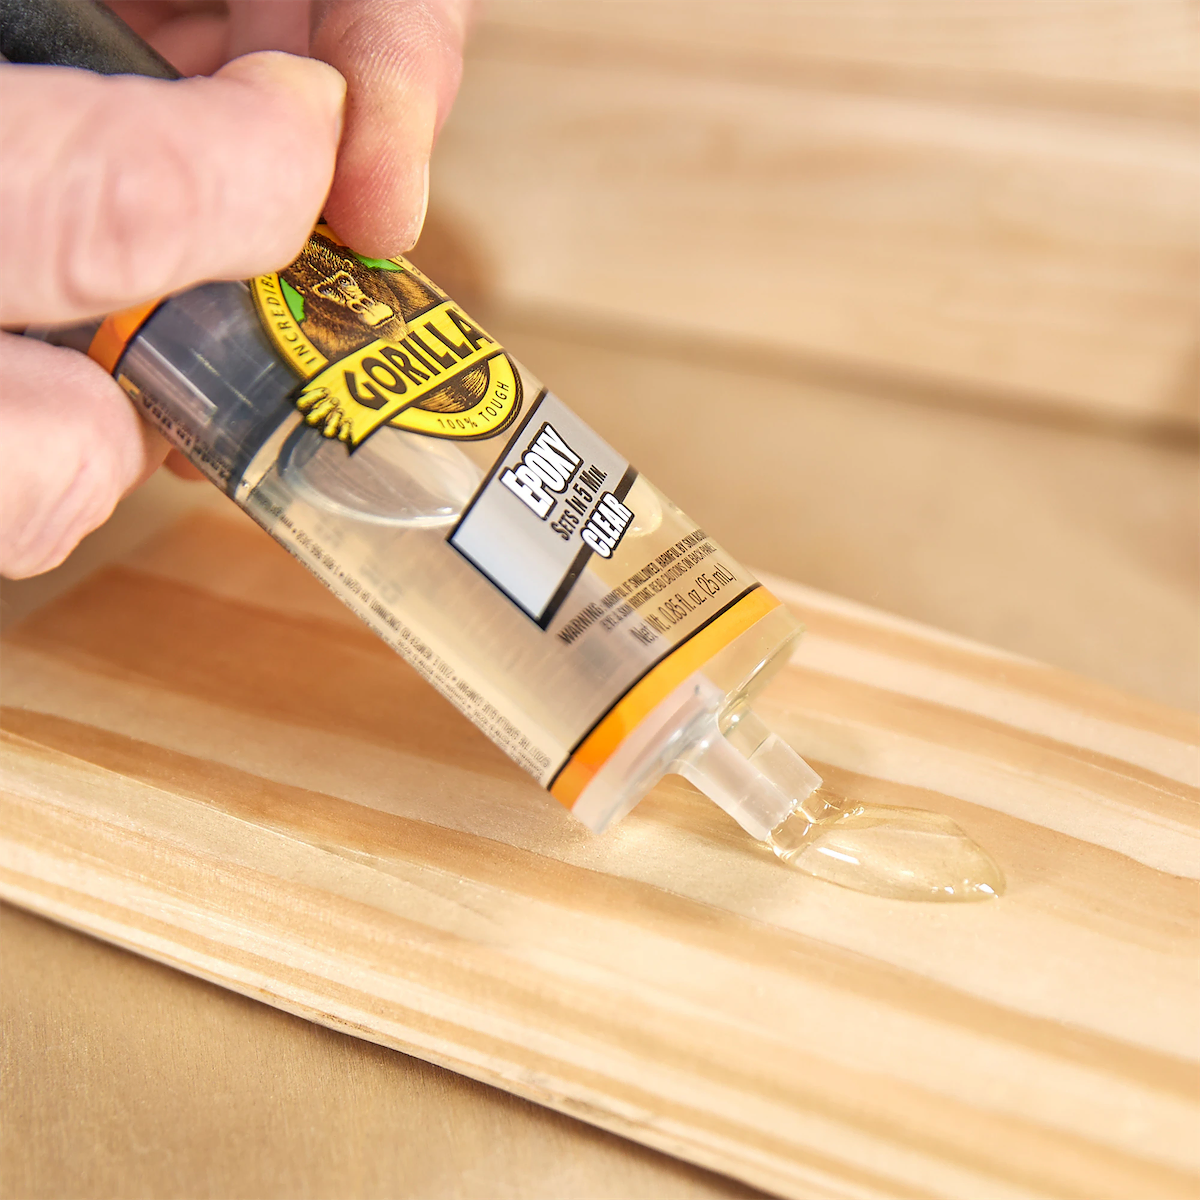
- Apply the epoxy to your fix. The mixture will continue to thicken, and the bond strength will decrease the longer you wait to apply.
- For Epoxy Clear: Apply within 5 minutes
- For Epoxy Ultimate: Apply within 3 minutes
- Join the surfaces and clamp them firmly. Leave your project undisturbed to allow the epoxy to fully cure and reach maximum strength.
.webp)
- Pull the plunger back slightly.
- Wipe the tip clean with a dry cloth.
- Align the notch on the tip with the cap and close tightly for storage.
.webp)
Timing Notes
Epoxy Clear: 5 minutes
Epoxy Ultimate: 10 minutes
Allow to cure for 30 minutes undisturbed
(no weight or handling)
24 hours
Watch our step-by-step video
For tough repairs that need more than just a quick fix.
Gorilla Epoxy bonds well to a wide variety of surfaces including most plastics*, metal, wood, glass, ceramic, stone, tile and fiberglass.

Metal
Wood

Ceramic
Glass
Most Plastics*
Stone

Tile
Fiberglass
*Not recommended for use on polyethylene or polypropylene plastics.
Stop replacing and start
repairing with confidence
Gorilla Epoxy Clear
For clean, quick, indoor fixes:
Go with Gorilla Epoxy Clear.
Gorilla Epoxy Ultimate
For maximum strength and outdoor repairs:
Reach for Gorilla Ultimate Epoxy.
Frequently Asked Questions
We realize any DIY project may have a spill and we want to help you with tips and tricks to successfully remove glue from fingers and nails.
For bonded skin, please call 1-800-420-7186 to speak to a medical professional.
Gorilla Epoxy is designed for versatility and bonds strongly to a wide range of materials including metal, wood, glass, ceramic, stone, most plastics*, tile, and fiberglass.
*Not recommended for use on polyethylene or polypropylene plastics.
While Gorilla Epoxy sets in as little as 5 to 10 minutes depending on the product, a full cure typically takes 24 hours. For best results, follow the specific product instructions and allow adequate time for the epoxy to harden completely before handling.
Yes, clamps are recommended for use during setup to ensure the bond sets correctly.
Heading 1
Heading 2
Heading 3
Heading 4
Heading 5
Heading 6
Lorem ipsum dolor sit amet, consectetur adipiscing elit, sed do eiusmod tempor incididunt ut labore et dolore magna aliqua. Ut enim ad minim veniam, quis nostrud exercitation ullamco laboris nisi ut aliquip ex ea commodo consequat. Duis aute irure dolor in reprehenderit in voluptate velit esse cillum dolore eu fugiat nulla pariatur.
Block quote
Ordered list
- Item 1
- Item 2
- Item 3
Unordered list
- Item A
- Item B
- Item C
Bold text
Emphasis
Superscript
Subscript